I can't seem to find a hole saw when I need one. Guess I need to build a place to put them so I will always know where they are. This sound like a good small box project. Okay what do I do?
Every receipt has to have a list of ingredients, so here's mine.
- One spare piece of lumber.
- Table saw.
- Router Table.
- Glue, Clamps.
Got all the stuff so I guess we can get started.
Every receipt also has to have a step by step, so here's mine.
Darn the lumber stock I found in my "yet to be utilized" (scrap) bin, is wider than I need it to be. Guess I need to rip it to the correct width. Okay that's done, darn it's also longer than I need, guess I need cut to length. Oh, I need to remember the saw kerf when deciding on the length, so it's the length plus 1/2 inch.
Okay the dust has cleared and I have a piece of stock that is the right width and length.
Darn it's thicker than I need it to be, guess it's time to resaw it to the right thickness. Okay back to the table saw with my resaw jig mounted and setup.
Okay, once again the dust has cleared (Thank goodness for dust collection) and I have the stock the right thickness.
Now I need to make four pieces for the box out of the one piece of stock. Okay back to the table saw (darn setup again), let's see, the box is going to be 6" by 4" so I guess I need two 6" pieces and two 4" pieces. If I figured everything right, that's what I will end up with. Okay, got it.
Now for the boring layout work. We need to decide which of the 6" pieces will be the front and back, and which of the 4" pieces will be the left and right sides.
Okay, got that, now which will be the top and bottom of each piece. Yes, you need to figure that out now so we will cut the box joints the right way. Trust me, I've done it wrong enough times. If it goes wrong here, you'll be back to step one (not fun).
Okay, the layout is done. Now we can get to the fun stuff of cutting the box joints.
It's off to the router table (in my case) with the box jig mounted. Let's see, box joints on two ends of four pieces, I'm going to be at the router table for a while.
Okay, box joints are done, does it all fit together? Great I have a four sided box that actually looks like a box. Guess I can glue it up and start on the top and bottom.
Okay, it's all glued up and the top and bottom are on. Last building step is to cut the top of the box off. Yes, that's right, you built a box with no way to get into it. The top is usually cut at the first full box joint, but that's a matter of how tall you want the top to be.
Okay, now for the finishing touches. I usually mount the hinges before I stain, that way I won't mess up the finish when mounting the on the final product.
As for the finished product. Here if is.
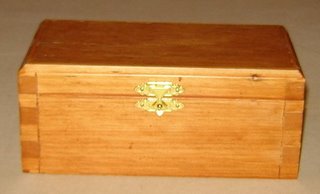
The process sound rather long and involved but it really only takes a couple of hours once you get the stock prepared. The stock preparation is another couple of hours, depending upon the initial size of the stock.